

After a long day of sitting, your hips can feel like rusty hinges. You stand up, try a big stretch, and somehow feel almost the same. Frustrating, right?
Hip circles exercise asks more of your hips than stretching alone. It gets them moving, warms the surrounding muscles, and helps you regain control through their natural range of motion. You do not need special equipment, a gym membership, or circus-level flexibility.
I use hip circles before walks, strength sessions, and on days when I have spent far too much time in a desk chair. They take less than two minutes, and they can leave your lower body feeling much less cranky.
Why hip circles help stiff hips so much
Static stretching asks a muscle to lengthen and hold. Hip circles ask your hips, glutes, core, and legs to coordinate movement. That difference matters when sitting, inactivity, or limited movement habits cause your stiffness.
Your hip joint works as a ball-and-socket joint, so it moves in several directions. Hip circles take the joint through flexion, extension, rotation, and side-to-side movement in one pattern. Instead of stretching one angle, you practice several.
Hip circles do not replace every stretch. Tight muscles may still respond well to a targeted stretch, especially after exercise. But dynamic hip mobility exercises often make more sense before activity because they prepare your body for movement instead of asking it to settle into a long hold.
Movement gives your brain useful information
Your nervous system monitors what you do. When you move your hips slowly and comfortably, you tell your brain that the range feels safe. Your body may then ease some of the tension it uses for protection.
Do not force a huge circle through sharp pain. Pain does not earn bonus points. Small, smooth circles work better than a dramatic wobble.
The CDC recommends regular physical activity because movement supports overall health, strength, and daily function. Hip circles do not cover every part of fitness, but they offer an easy way to move more often.
How to do the standing hip circles exercise properly
The standing version works almost anywhere. Try it while your kettle boils, before a workout, or after a two-hour meeting. Your hips deserve a break too.
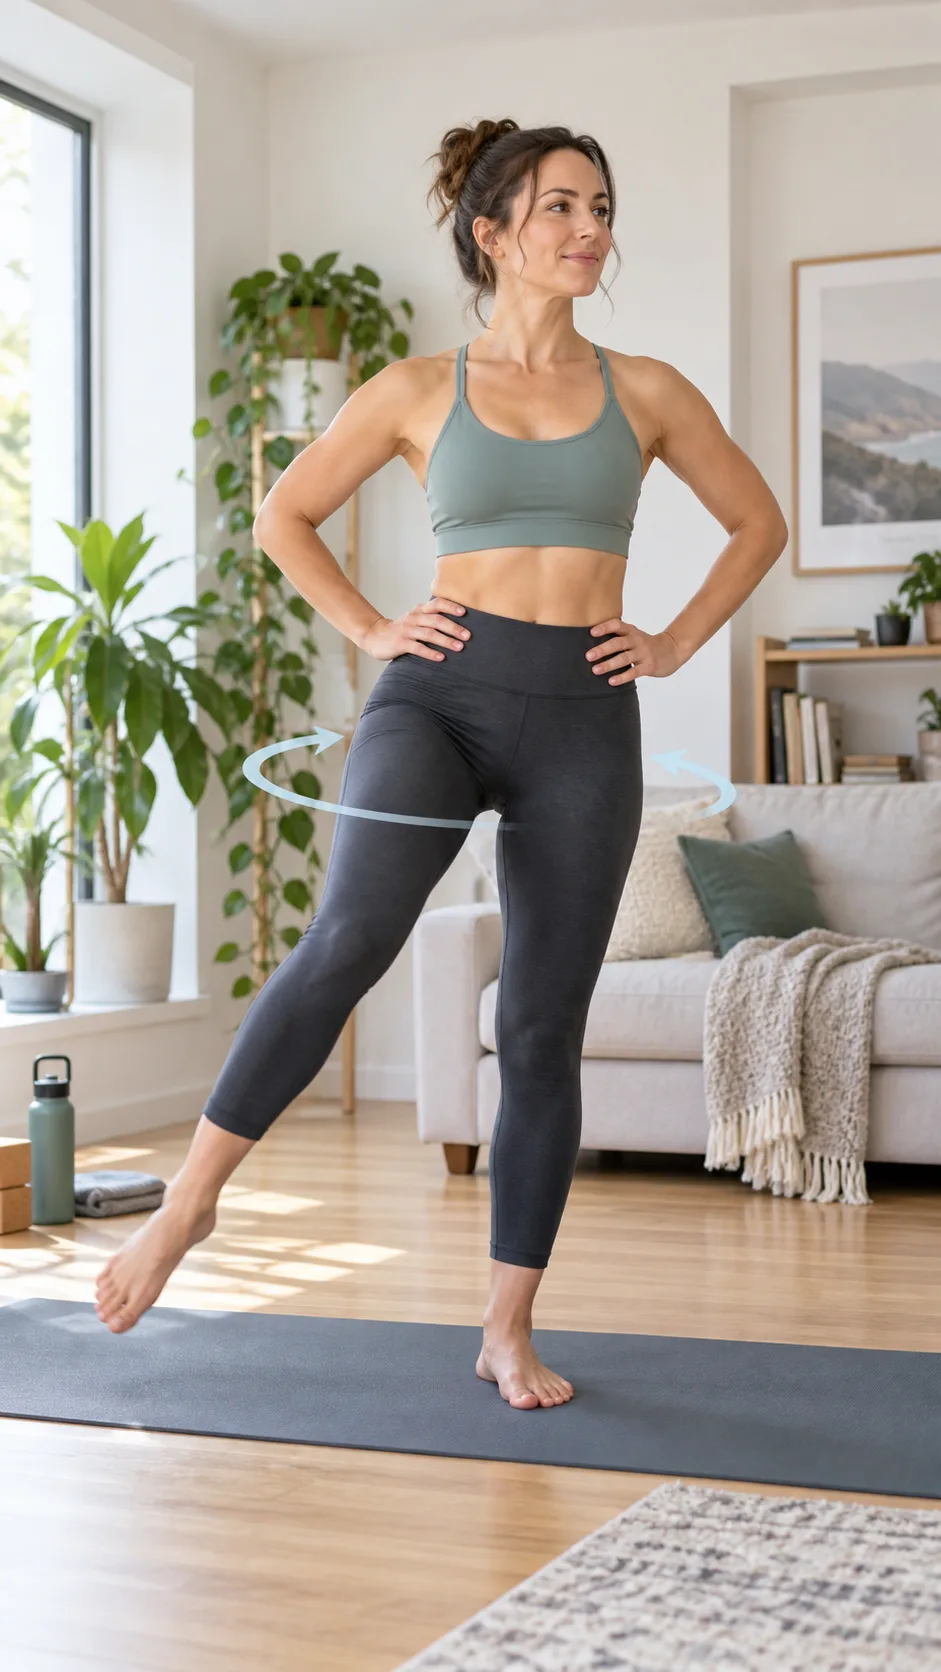
- Stand tall with your feet about hip-width apart.
- Place both hands on your hips or hold a wall for balance.
- Lightly tighten your stomach as if you expect a gentle poke.
- Shift your weight into one foot without locking that knee.
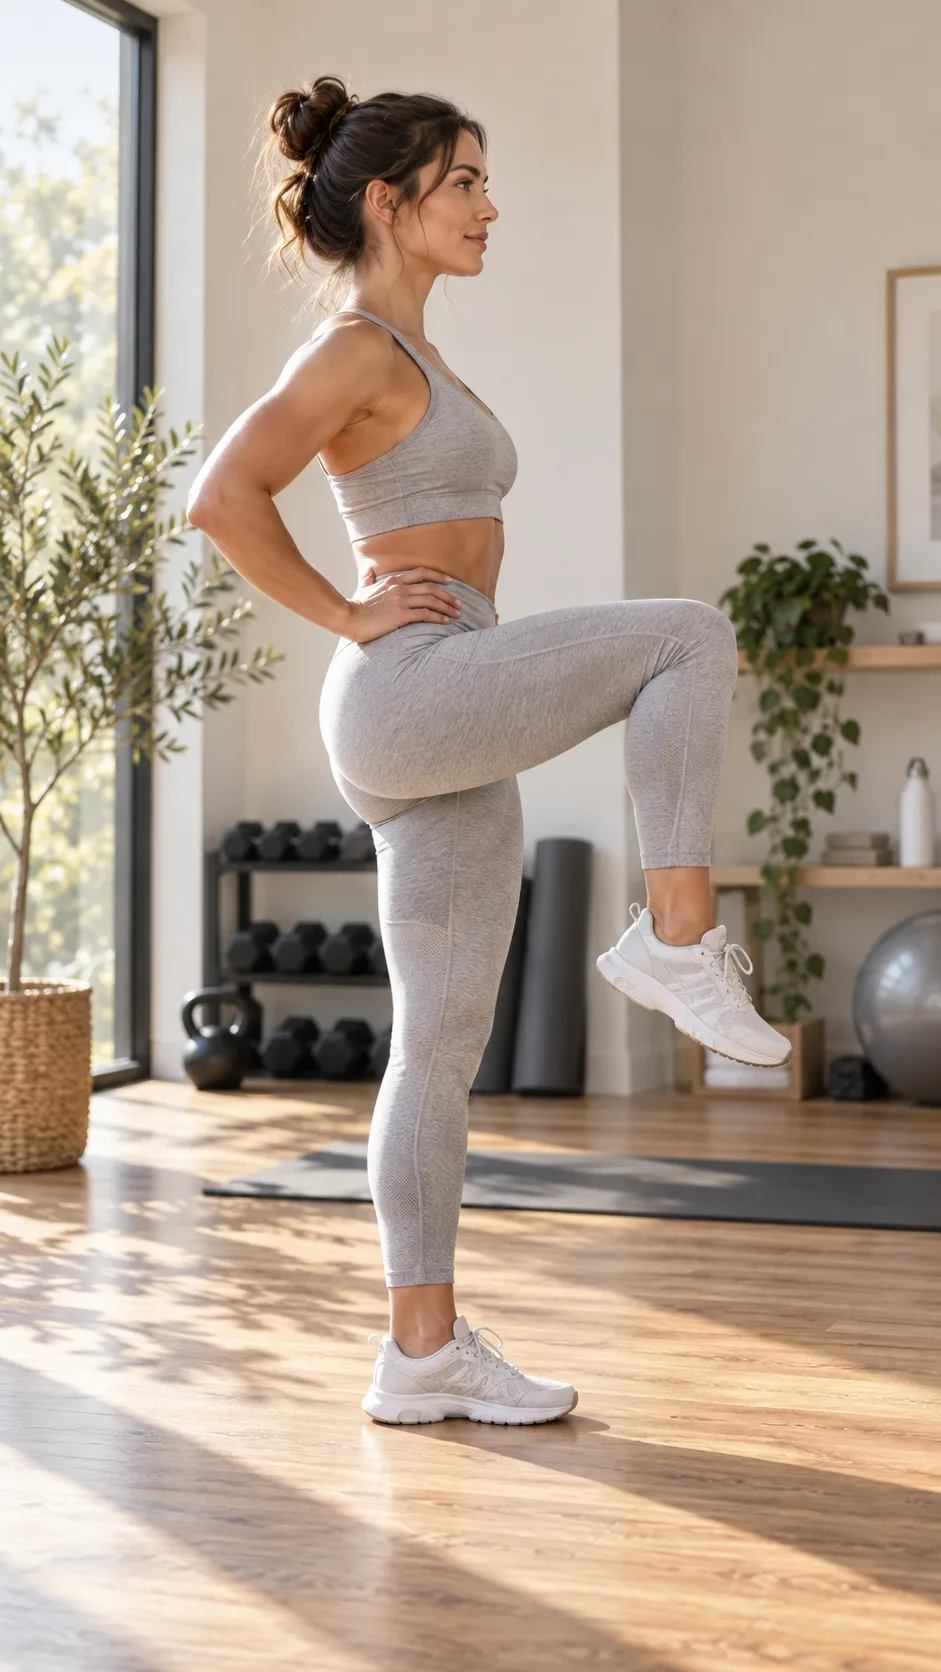
- Lift the opposite knee slightly, then draw a slow circle with your knee.
- Keep your pelvis as steady as possible while your thigh moves from the hip socket.
- Complete 5 to 10 circles in one direction, then reverse the direction.
- Switch legs and repeat.
Move slowly enough to feel what your hip does. Your knee acts as a pointer, while your hip joint creates the circle. If your whole body starts turning like a shopping trolley with one broken wheel, shrink the circle.
What you should feel
You may feel your hip flexors, glutes, inner thighs, and outer hips start working. You may also notice a mild pull at the front or side of the hip. That feeling can be normal when it stays gentle and fades as you move.
Do not push through deep groin pinching, sudden catching, numbness, or sharp pain. Stop if you feel any of those symptoms. A qualified physiotherapist or clinician can help identify the cause, especially if pain changes the way you walk.
The American Academy of Orthopaedic Surgeons explains hip arthritis symptoms and treatment options, including when ongoing pain needs proper assessment. Do not try to diagnose yourself during a heroic five-minute Google session.
Hip circle variations for mobility, strength, and better control
The best hip circle variation depends on your balance, comfort, and goal. Start with the easiest option that lets you move smoothly. Your body responds better to steady practice than drama.
1. Hands-on-hips standing circles
This version helps beginners feel their pelvic position. Keep both feet on the floor and circle your hips as though you draw a small ring with your belt buckle. Use a controlled motion instead of turning it into a giant hula-hoop routine.
Try 8 slow circles in each direction. This option can ease your lower back and hips after sitting because it encourages gentle movement through your pelvis and trunk.
2. Knee-lift hip circles
This version works one hip at a time. Lift one knee, draw a circle, and resist the urge to lean to the side. Your standing glute works hard, so you build balance and pelvic stability at the same time.
Use this variation before running, squats, lunges, or leg day. It makes a useful dynamic warm-up for hips because it combines mobility with control.
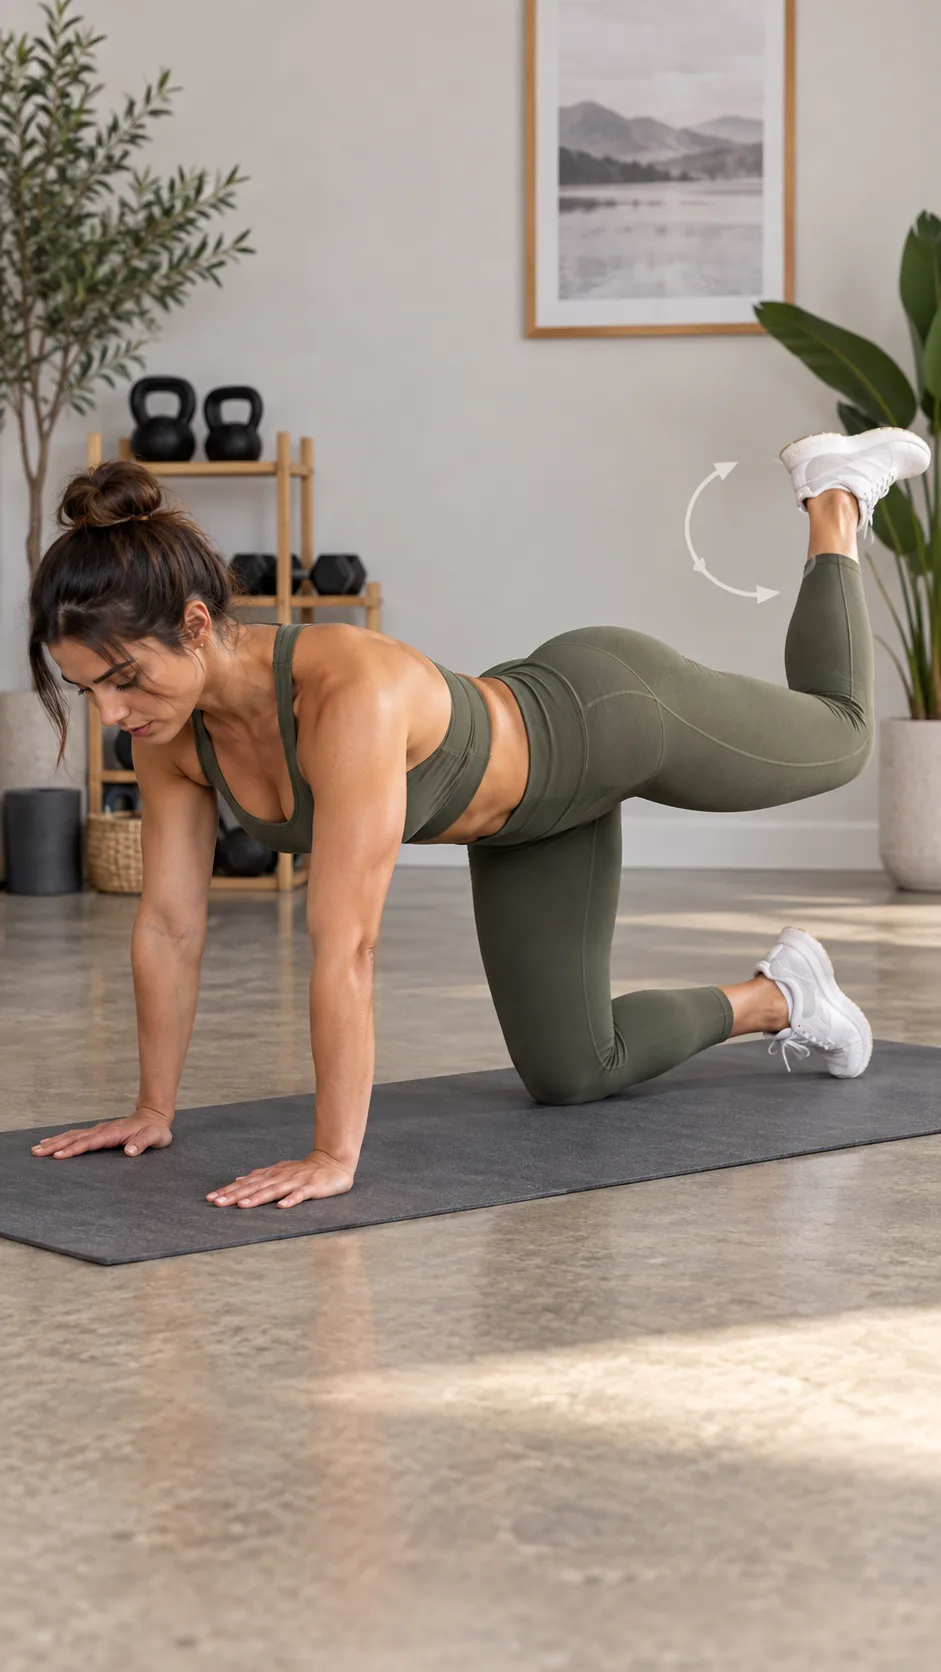
3. Quadruped hip circles
Start on your hands and knees with your hands under your shoulders and knees under your hips. Lift one knee slightly off the floor, then make small circles with that bent leg. Keep your ribs gently drawn in and avoid letting your lower back sink toward the floor.
This variation lets you focus on hip movement when standing balance gets in the way. Many people call it a “fire hydrant circle,” which sounds silly but makes sense once you see the movement.
4. Seated hip circles
Seated circles work well during office breaks or for anyone with limited balance. Sit near the front edge of a sturdy chair, lift one foot a few centimetres, and draw slow circles with your knee. Keep your torso upright instead of folding into laptop posture.
These circles do not replace full body exercise, but they beat staying still for another hour. Your chair should support your body, not become your permanent habitat.
How many hip circles should you do?
Start with 5 to 10 circles per direction on each side. Do one or two rounds before exercise, after long periods of sitting, or whenever your hips feel stiff. Focus on good movement instead of chasing a big rep count.
- Use slow circles before workouts to warm up your hips.
- Use gentle circles after long sitting to ease stiffness.
- Use smaller circles when you feel limited or sore.
- Use larger, controlled circles only when your hips feel comfortable.
- Pair hip circles with walking, squats, and glute strengthening exercises for better long-term results.
Try them daily for one week and notice your squat depth, walking comfort, and ability to stand after sitting. You may spot small changes before you feel dramatic ones. Mobility rewards patience, even when that feels unfair.
Hip circles vs stretching: which one wins?
Hip circles and stretching work well together. Hip circles let you practice active movement and control. Stretching lets you spend more time in one position when a muscle feels truly tight.
Use hip circles before activity because they prepare you to move without leaving you feeling sleepy or floppy. Save longer static stretches for after training or for a separate mobility session. Your body needs movement and recovery.
For example, use hip circles before a walk, then add a hip flexor stretch afterward if the front of your hips still feels tight. If your lower back joins the complaint department, try these anterior pelvic tilt correction exercises to strengthen and mobilise the muscles that affect pelvic position.
Many people blame tight hip flexors for everything from sore backs to bad moods. Sometimes weak glutes, low activity, poor sleep, stress, or an old injury cause the problem. A good routine considers the full picture instead of choosing one villain.
Build a 5-minute hip mobility routine
You can combine hip circles with a few basic movements for a quick routine that needs no equipment. This sequence works well before walking, gym training, dancing, or picking something up without making sound effects.
- Standing hip circles: 8 circles each direction.
- Knee-lift hip circles: 6 circles each direction per leg.
- Bodyweight squats: 8 to 12 controlled reps.
- Glute bridges: 10 controlled reps.
- Half-kneeling hip flexor stretch: 20 to 30 seconds per side.
Keep breathing steadily through each movement. Exhale during effort, and do not hold your breath as if you negotiate a hostage situation. Your core and hips work better when you stay relaxed enough to control them.
Food also supports training and recovery. If you want simple meal ideas to go with an active routine, check out this Nigerian weight loss meal plan guide for balanced options and practical structure.
When you should skip hip circles and get help
Skip hip circles if they cause sharp pain, joint locking, dizziness, or symptoms that travel down your leg. Seek medical advice if you cannot bear weight, pain follows a fall, or symptoms continue despite rest and gentle movement.
Talk with a clinician before starting new exercises if you recently had hip surgery, a fracture, or a diagnosed joint condition. The NHS guide to hip pain explains warning signs and common reasons to seek care.
Pay attention to patterns without panicking. Regular movement often helps mild stiffness after sitting. Persistent pain needs more attention than a random mobility tip from the internet.
Final thoughts: Give your hips a daily minute
Hip circles exercise gives stiff hips a simple, active reset. It improves hip mobility, warms up the lower body, supports balance, and helps you return to movements that long hours of sitting can dull.
Start small, move slowly, and keep every circle pain-free. Add a few circles before your next walk or workout, then notice how your hips feel. Your body does not need perfection. It needs regular reminders that it can move.