

You stretch your hip flexors, press a ball into your belly, and wait for your hips to loosen. Still, your lower back complains, your stride stays short, and stiffness keeps settling into your hips.
Here is the uncomfortable truth: aggressive attempts to “release” your psoas can leave tight hips feeling worse. Your body often tightens that area for a reason, and harder pressure rarely changes that reason.
A better approach uses psoas mobility, breathing, glute strength, trunk control, and more movement during the day. It may sound less exciting than a magic psoas release, but it helps most people more.
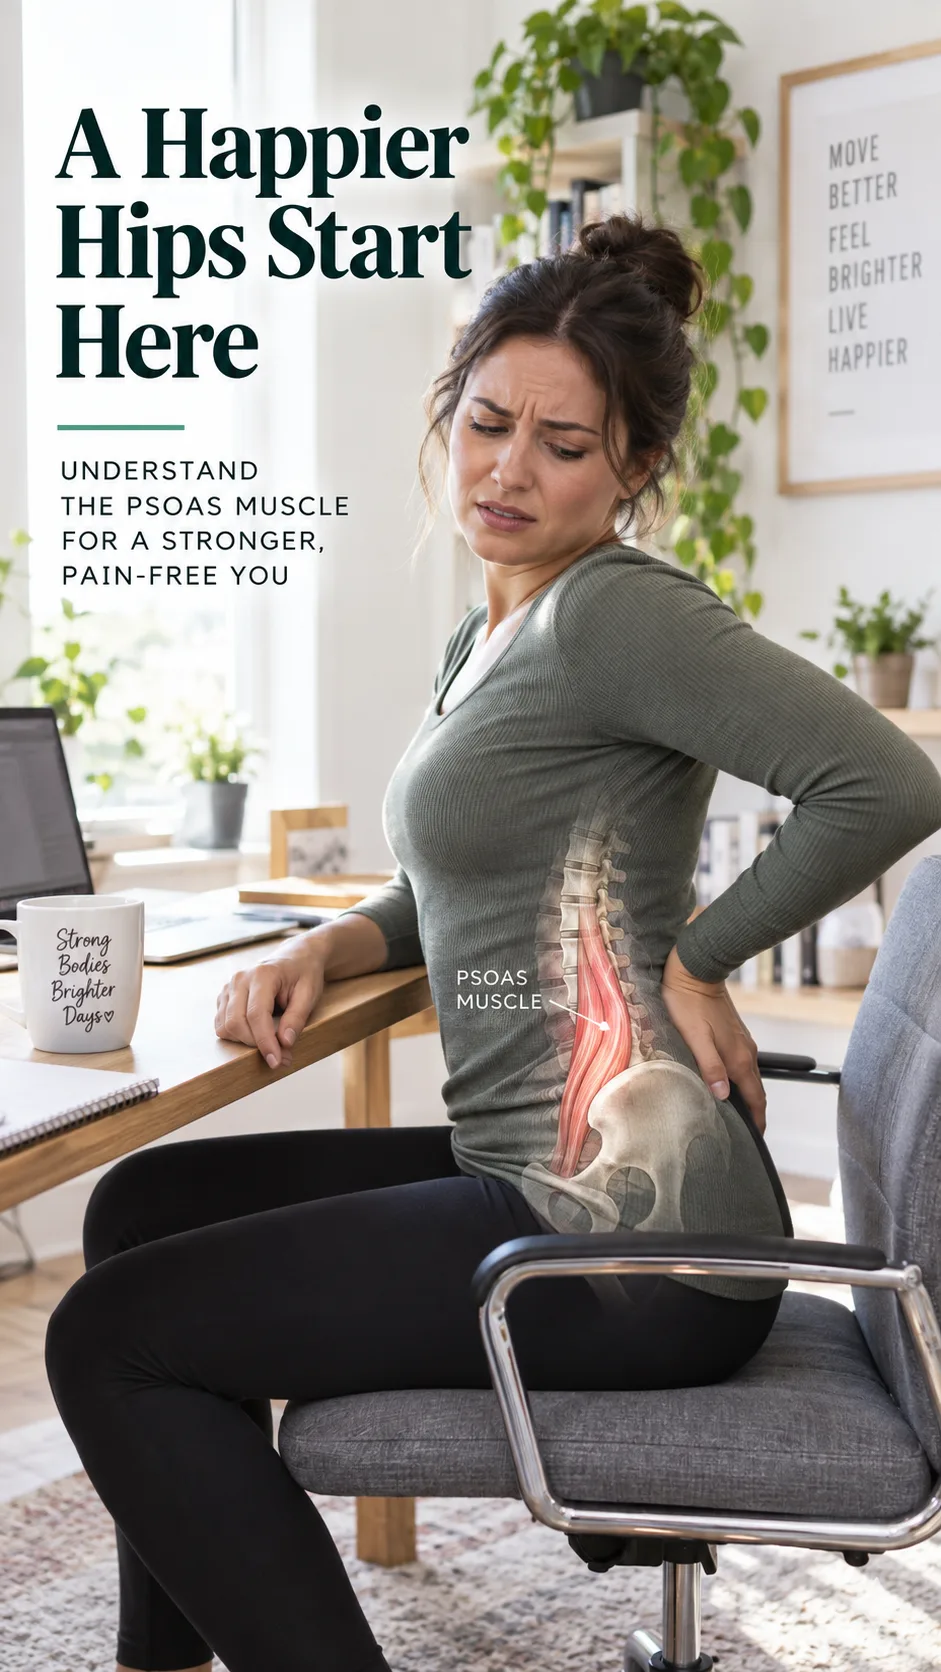
First, what does your psoas do?
Your psoas runs from your lower spine, through the front of your pelvis, and attaches near the top of your thigh bone. It lifts your knee, helps you walk uphill and climb stairs, and stabilizes your trunk while you move.
People often call it “the hip flexor,” but that label leaves out a lot. Your iliacus, rectus femoris, tensor fasciae latae, adductors, glutes, abdominal muscles, and nervous system all affect how your hips feel.
Your psoas does not spend its day trying to wreck your posture. Like every other muscle, it responds to load, position, stress, breathing, fatigue, and your usual movement habits.
The National Center for Biotechnology Information describes the psoas muscle’s role in hip flexion and lumbar movement. That anatomy matters because one small area cannot explain every whole-body movement problem.
The common psoas release mistake: forcing relaxation
Many people dig fingers, elbows, massage balls, or massage guns into the front of the abdomen and call it a “psoas release.” Some people tolerate that method, but it can create more guarding, soreness, and anxiety about movement.
Your body does not relax because you use more pressure. When your body senses a threat, it often protects sensitive tissue. If you hold your breath, clench your jaw, or wince through the drill, your nervous system probably does not feel safe.
Why deep pressure can backfire
Your psoas sits deep in the abdomen near important structures. A tennis ball or a determined elbow cannot reliably isolate it, regardless of what an Instagram reel claims.
Deep pressure can irritate your abdominal wall, compress tender tissue, and prompt a protective response. Intense sensation may bring temporary relief, but that relief does not prove that your hip now moves or works better.
Your hip may feel “loose” for ten minutes after a brutal release, then tighten again. Your body may have changed its sensation for a while without changing why it started bracing.
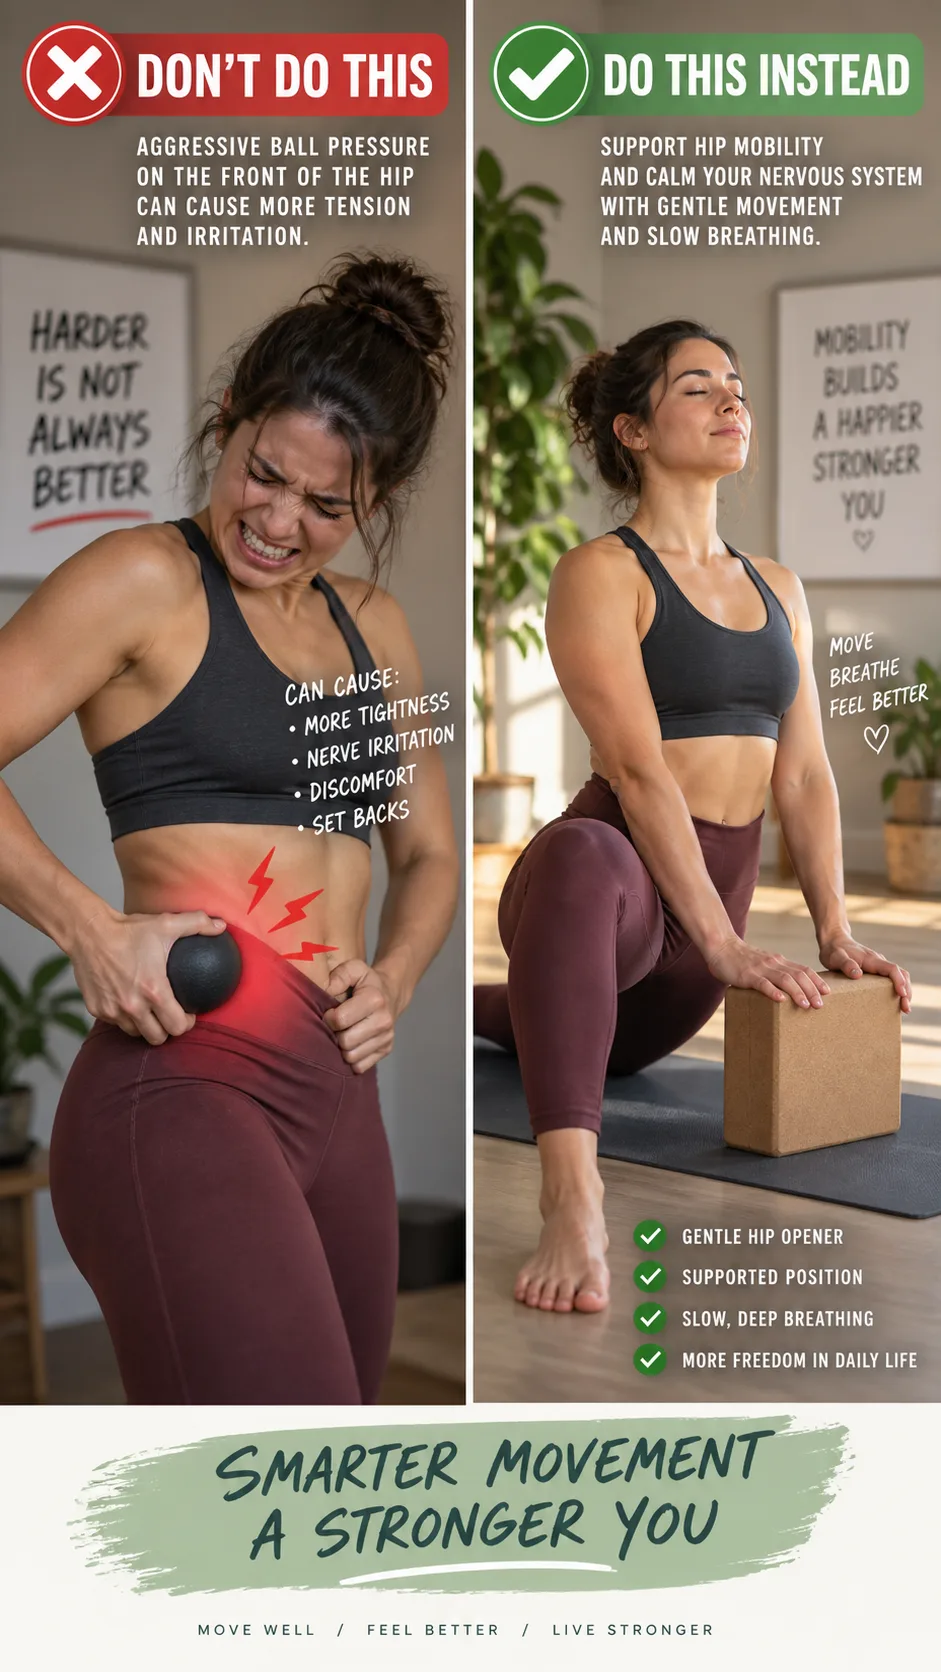
Stop chasing pain
Many people mistake discomfort for progress. Fitness culture sometimes sells pain like it comes with a loyalty card, but your hips do not need punishment to improve.
A helpful mobility drill should leave you feeling steadier, freer, or more confident afterward. It should not leave you limping around your kitchen as though you lost a fight with a folding chair.
Stop the drill if sharp pain, tingling, numbness, groin pain, or worsening back pain appears. Contact a qualified physiotherapist, sports medicine clinician, or doctor for personal guidance.
Why your hips feel tight in the first place
“Tight hips” describe a feeling, not a diagnosis. Your body may create that feeling because a muscle needs more strength, your joints need better control, your back feels irritated, or you spend long stretches sitting still.
Your nervous system also affects the picture. Stress, poor sleep, hard training, and limited recovery can raise muscle tone throughout your body, including at the front of your hips.
Consider your usual day. Do you sit for hours, jump into a workout, stretch hard, then go back to your chair? Your hips may need more short movement breaks rather than another extreme psoas stretch.
- Long sitting periods: You hold your hips in a bent position for long periods, then they may feel stiff when you stand.
- Weak or underused glutes: Your hip flexors may work overtime when your glutes do too little.
- Poor trunk control: Your lower back may arch too much during walking, running, or lifting.
- Training overload: Sprinting, cycling, kicking, and heavy leg work can fatigue your hip flexors.
- Stress and shallow breathing: A tense rib cage and clenched abdomen can make your body guard the area.
- Limited movement variety: Your body needs more than one fixed desk posture all day.
The Centers for Disease Control and Prevention recommends regular physical activity for broad health benefits. Short movement breaks count too.
What helps: build safety, strength, and options
The best approach does not try to “release” anything. It helps your body use your hips through more range, with better control, under everyday load.
Start easy. Finish these drills feeling better than you felt at the start, not flattened on the floor and questioning every life decision.
1. Use breathing to reduce unnecessary bracing
Start with 90/90 breathing. Lie on your back, rest your lower legs on a chair or sofa, and place your hips and knees at roughly 90 degrees.
Exhale slowly through your mouth for five to eight seconds. Let your ribs come down and let your lower abdomen tighten gently. Then inhale quietly through your nose without forcing a huge breath.
Take five slow breaths. This position can reduce an excessive lower-back arch and give your hip flexors a break from constant tension.
2. Add a gentle hip flexor stretch
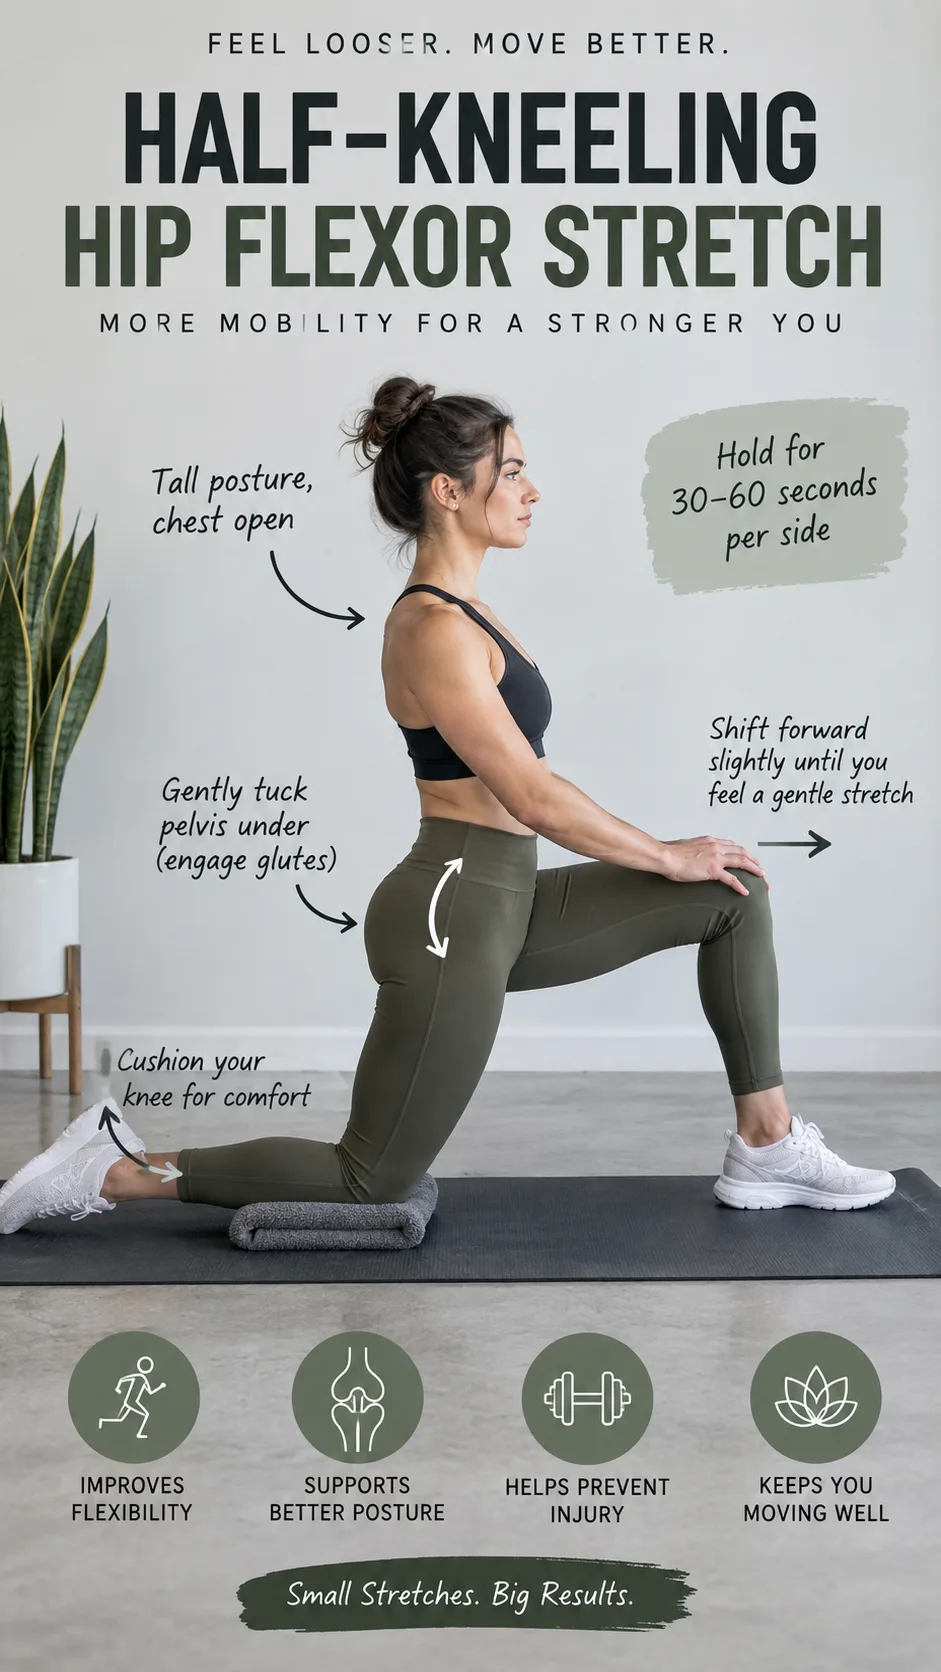
Try a half-kneeling hip flexor stretch after the breathing drill. Put one knee on a cushion, hold your torso tall, gently tuck your pelvis, and squeeze the glute on the kneeling side.
Shift forward only a little. You should feel a mild stretch at the front of your hip, not a pinch in your lower back or groin.
Hold the position for 20 to 30 seconds and repeat it one or two times on each side. Use less range than you think you need. Controlled tension works better than dramatic stretching.
3. Teach your glutes to share the work
Your glutes extend your hips when you stand, walk, climb, and run. When they do their share, your psoas does not have to handle every task like an exhausted intern.
Try a basic glute bridge. Lie on your back, bend your knees, press through your feet, exhale gently, and lift your hips without cranking through your lower back.
Pause for two seconds at the top, then lower slowly. Complete two or three sets of eight to twelve reps. Feel your glutes work. If your hamstrings cramp, move your feet a little closer to your body.
4. Train hip flexion instead of avoiding it
A psoas can feel tight because it needs strength. If you never train active hip flexion, your body may brace when you ask it to perform that movement.
Try a controlled standing march. Stand tall near a wall or counter, brace your trunk gently, lift one knee to hip height, pause, and lower it without leaning back.
Perform six to ten slow reps on each side. Add a light resistance band after you can control the basic movement. Strength tells your nervous system, “We can handle this.”
- Exhale gently before you lift your knee.
- Keep your ribs over your pelvis.
- Lift only as high as you can without arching your back.
- Lower slowly instead of dropping your foot.
- Stop before fatigue turns the drill into a wobble festival.
A simple 10-minute routine for tight hip flexors
You do not need a 45-minute mobility ritual with twelve bands and a candlelit soundtrack. Try this short psoas mobility routine three to five days a week, especially after long sitting or before lower-body training.
- 90/90 breathing: Take five slow breaths.
- Half-kneeling hip flexor stretch: Do two rounds of 20 to 30 seconds on each side.
- Glute bridges: Do two sets of 10 reps.
- Standing controlled marches: Do two sets of eight reps on each side.
- Easy walk: Walk for five minutes at a comfortable pace.
Track how you feel over two to four weeks. Watch for easier walking, smoother squats, less gripping in your lower back, and better tolerance for sitting and standing.
Nutrition also supports recovery from training. If body composition affects your comfort, energy, or joint load, this guide to Nigerian foods for weight loss offers practical meal ideas without claiming that one food fixes everything.
When you should get professional help
See a clinician if an injury started your symptoms, your symptoms worsen over time, pain wakes you at night, or pain changes how you walk. Seek prompt medical advice if you have an unexplained fever, abdominal pain, bowel or bladder changes, numbness, weakness, or pain that travels down your leg.
A good physiotherapist can assess your hip, lower back, gait, strength, and training habits. They can help you tell the difference between a simple mobility problem and issues such as hip impingement, tendon irritation, lumbar referral, or another condition.
The American Academy of Orthopaedic Surgeons provides information on hip strain symptoms and care. Online advice can help you choose a next step, but no website can examine you through a screen.
The bottom line on psoas release
Stop trying to bully your psoas into relaxing. Aggressive pressure can increase guarding, especially when your body already feels stressed, sore, or unstable.
Use calm breathing, gentle hip flexor mobility, glute strengthening, controlled hip-flexion work, and regular walking instead. These tools help your hips build capacity instead of chasing a brief “release” sensation.
Your hips do not need a dramatic rescue mission. Give them movement, strength, and patience. Then let consistency do its quiet work.