

Your knees do not hate squats. They hate sloppy reps, rushed descents, and the idea that more weight solves everything.
A well-performed squat builds strong legs, stronger hips, and better movement in daily life. It should feel steady and controlled, not like your knees just lodged a complaint.
Most knee pain during squats comes from a handful of fixable form errors. Work through the cues below, reduce the load for a week or two, and you may notice a big change in your squat quickly.
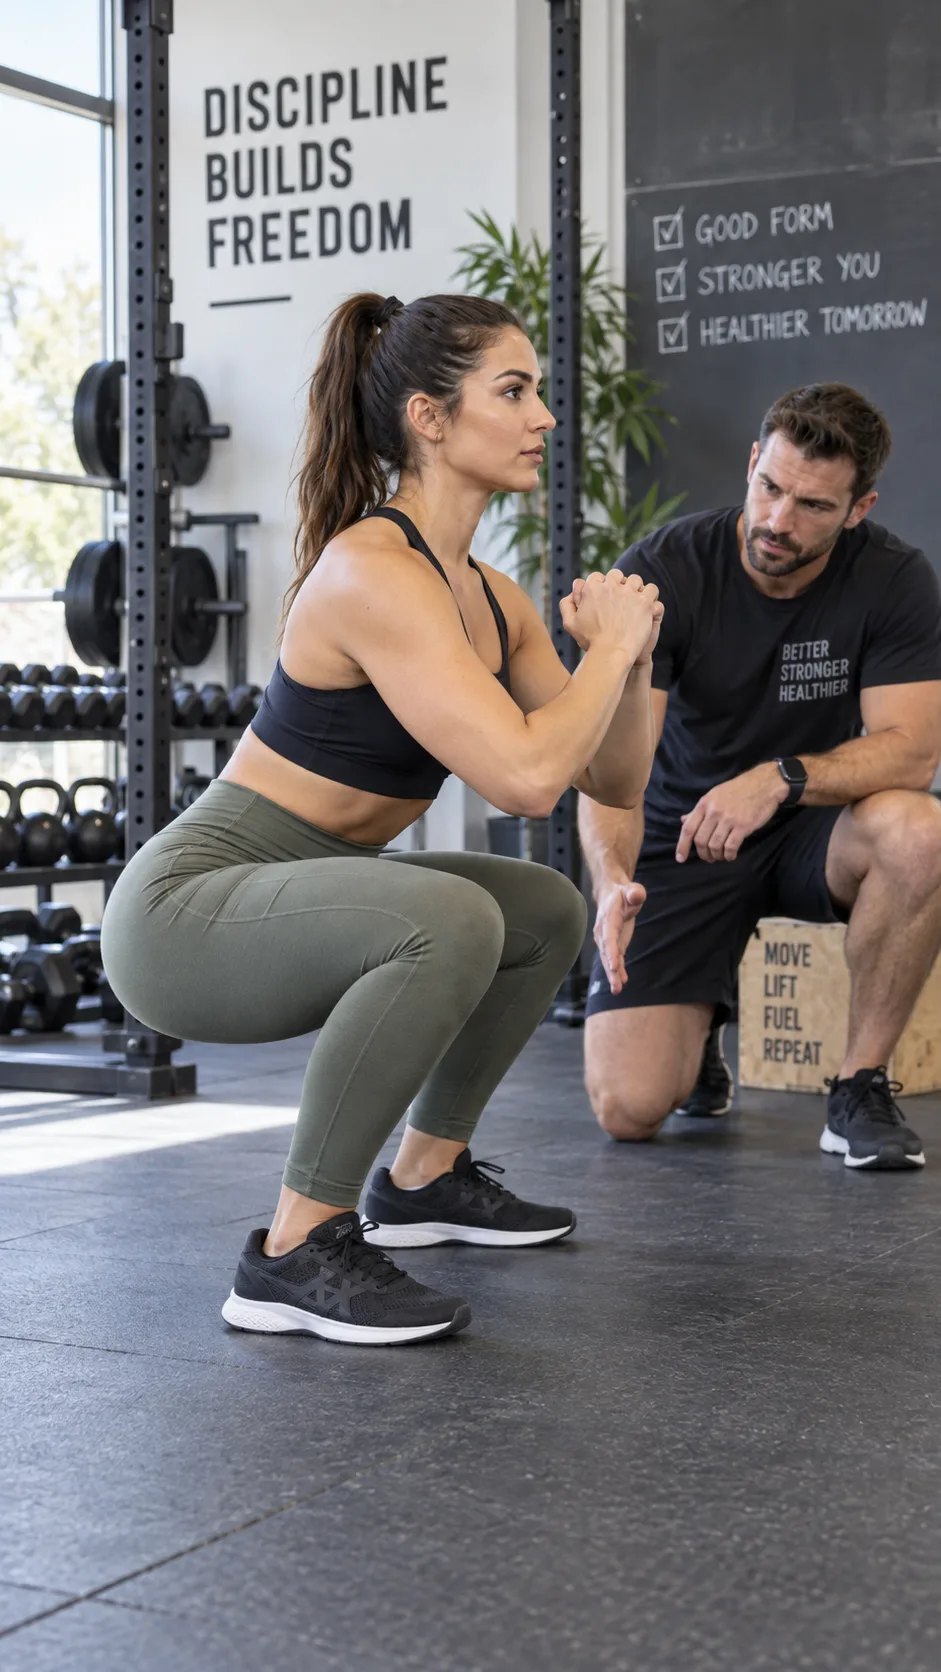
First: What does proper squat form look like?
No two people squat in exactly the same way. Your height, hip shape, ankle mobility, and training goal all affect your stance and depth.
Still, strong squats follow a few basics. Create tension before you descend, keep your full foot on the floor, let your knees move naturally, and stay in control from top to bottom.
- Set your feet about shoulder width apart, then turn your toes slightly out if that feels comfortable.
- Brace your torso as if someone wants to poke your stomach. Keep your ribs over your pelvis.
- Lower under control by bending your hips and knees at the same time.
- Keep your feet rooted through your heel, big toe, and little toe.
- Drive up through the floor and stand tall without pushing your lower back forward.
A controlled bodyweight squat can feel harder than a rushed barbell squat. That makes sense. Control exposes weak spots, which can humble you but often spares your knees.
The American Council on Exercise squat guide also recommends a tall chest, steady knees, and even pressure through the feet. Those habits matter more than most gym tricks.
Why squats sometimes make your knees hurt
Your knee sits between your hip and ankle, so it often picks up the slack when either joint struggles. If your hips lack control or your ankles cannot move well, your knees may take on more stress.
That does not mean your knees should never move forward. Your knees can and should travel over your toes in many squat variations, especially during deep squats or squats with an upright torso.
Trouble starts when your knees collapse inward, your heels rise, your pelvis loses control, or you add load faster than your body can adapt. Your body does not care about your PR when your technique falls apart halfway down. Rude, but fair.
If you feel sharp pain, swelling, locking, giving way, or pain that continues after training, stop forcing reps. Speak with a qualified physiotherapist, sports doctor, or coach who can assess your situation.
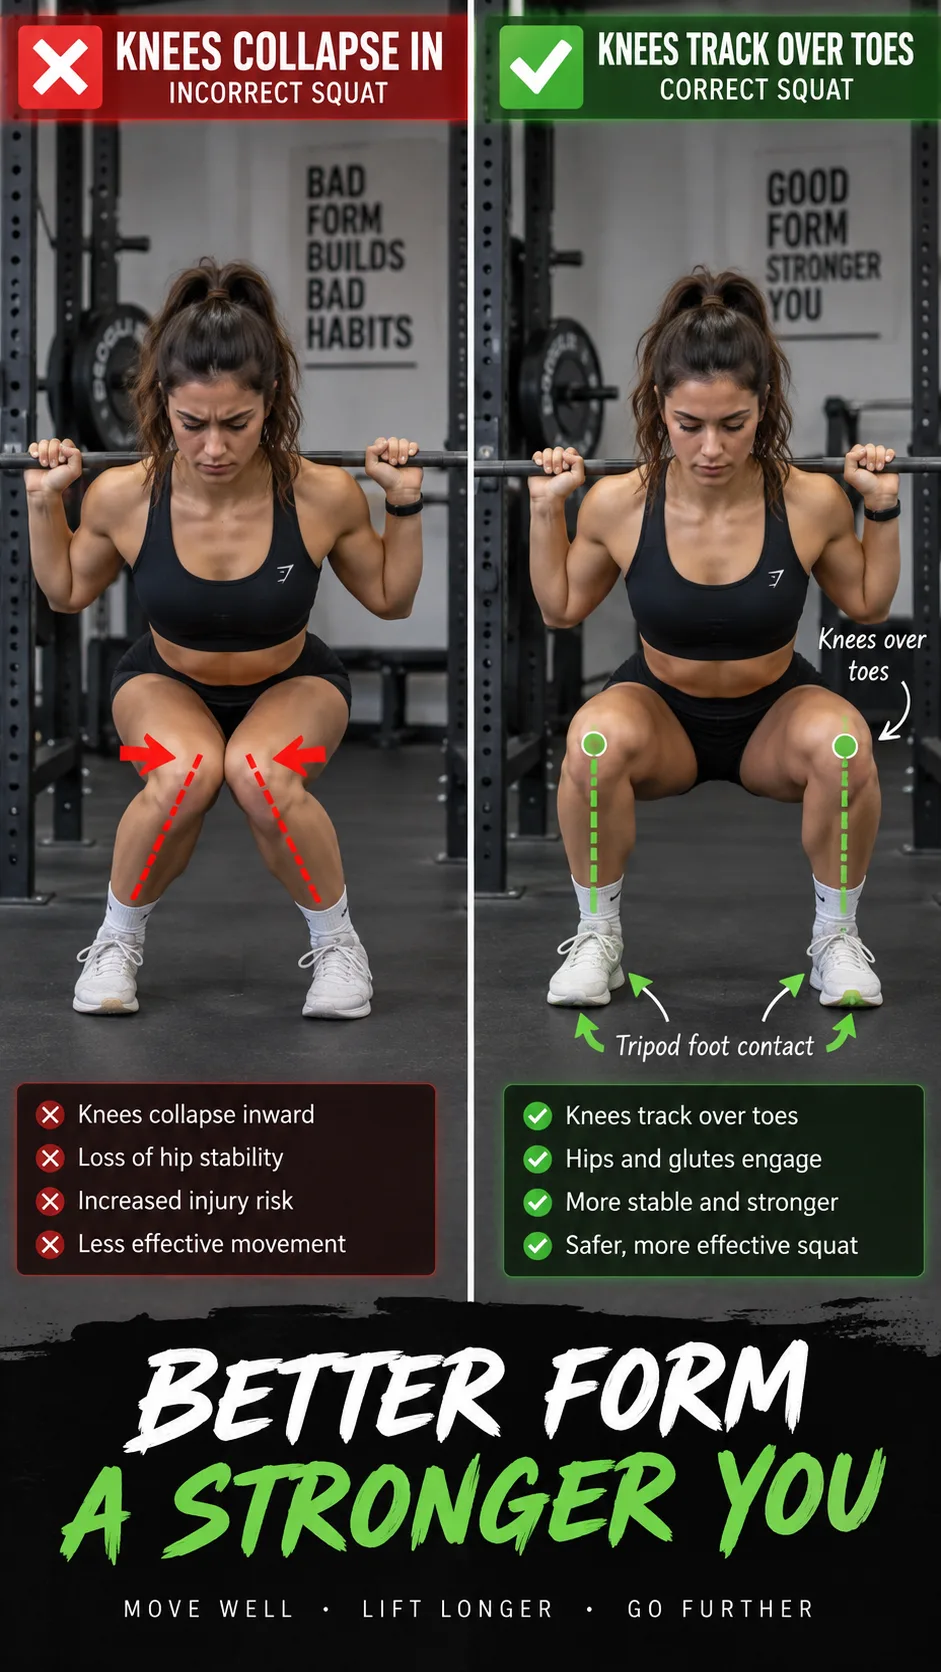
1. Your knees cave in during the squat
The mistake: Knee valgus
Your knees cave inward when they drift toward each other as you lower or stand up. You may notice it most on heavy sets, when you feel tired, during jump landings, or in single-leg exercises.
A small inward shift does not automatically hurt your knees. A large collapse usually points to poor hip control, weak foot pressure, or more weight than your current strength can manage.
The easy fix: Track your knees over your toes
Aim your knees in the same general direction as your toes. You do not need to force them dramatically wide. You need steady alignment.
- Press your big toe, little toe, and heel into the floor.
- Think: “Spread the floor with my feet.”
- Use less weight and take three seconds to lower.
- Add controlled split squats, step-downs, and glute bridges to improve hip control.
Film one set from the front. Your phone may catch a knee collapse sooner than the gym buddy who says, “Yeah, looks good,” while staring at the ceiling fans.
2. Your heels pop off the floor
The mistake: You squat on your toes
When your heels lift, your weight moves too far forward. Your knees then take on more work while your hips lose a strong position.
Tight ankles often cause this issue, though poor setup can cause it too. Some lifters start too narrow, rush the descent, or wear soft running shoes that make every rep feel wobbly.
The easy fix: Build a stable foot and improve ankle motion
Start each rep with a tripod foot: keep your heel, big toe, and little toe on the floor. Maintain contact at all three points throughout the squat.
Try a small heel lift with weightlifting shoes or sturdy plates while you work on ankle mobility. A heel lift does not mean you cheat. It helps many people squat comfortably to depth with a more upright torso.
- Perform knee-to-wall ankle rocks for 8 to 12 slow reps on each side.
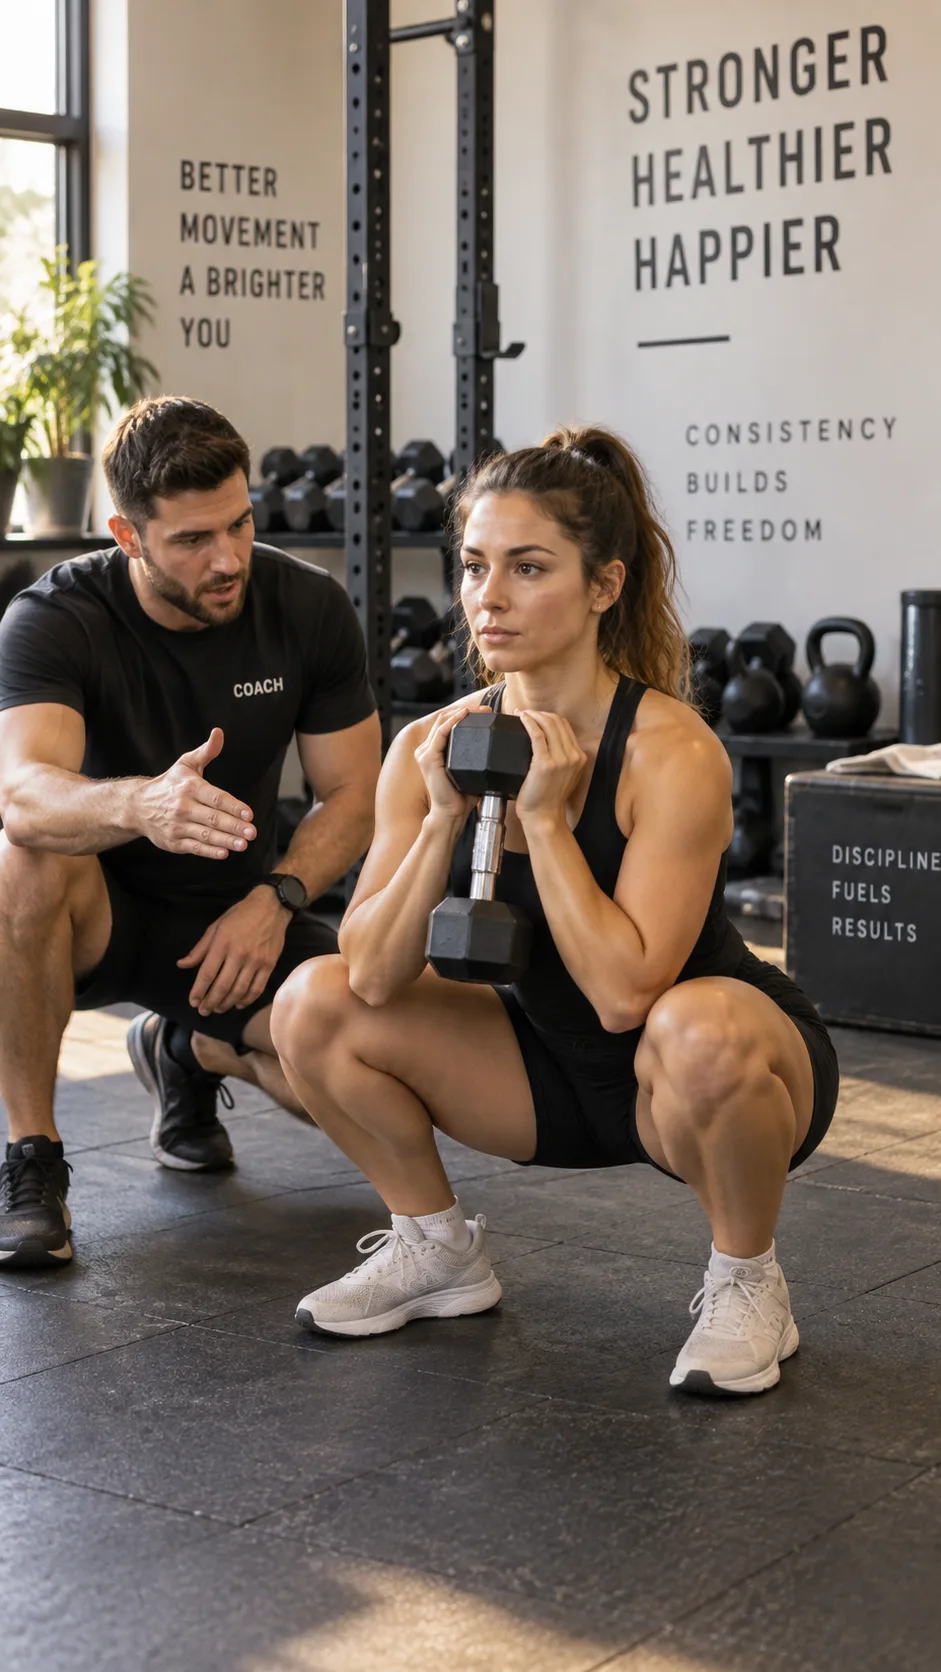
- Use goblet squats to practice balance with a counterweight.
- Wear flat, firm shoes for most strength training.
- Reduce your squat depth for now if you cannot keep your heels down.
For more on hip position and mobility, read what works for tight hips and psoas release. Your hips do not need magical “unlocking,” but they need strength and usable range of motion.
3. You let your lower back round at the bottom
The mistake: The butt wink takes over
Your pelvis may tuck under at the bottom of a squat and round your lower back. Coaches call this a “butt wink,” which sounds ridiculous because fitness people apparently enjoy chaos.
A small pelvic tuck at your deepest range does not always cause a problem. A large, sudden tuck under a heavy bar can make your lower back lose tension and shift you forward.
The easy fix: Own the depth you have today
Squat only as low as you can while you control foot pressure, your torso brace, and your pelvis. Depth matters, but control matters more.
Try a box squat to a bench or box that lets you repeat the same bottom position. Pause for one second, stay tight, then stand without rocking backward.
- Widen your stance a little and turn your toes out slightly more.
- Use goblet squats to learn a balanced torso position.
- Brace before each rep instead of inhaling halfway down.
- Build hip and ankle mobility gradually instead of chasing painful stretching contests.
If you use barbell squats, ask a knowledgeable coach to watch your setup from the side. The National Strength and Conditioning Association stresses controlled technique, sensible loading, and movement choices that fit the individual.
4. You drop into the bottom like a trapdoor opened
The mistake: You lose tension on the way down
A fast descent can feel powerful, but it can turn the bottom of your squat into a messy surprise. Your knees, hips, and back need muscular tension to control the load.
When you fall into the bottom, your joints absorb force before your muscles take control again. That can irritate your knees, especially when fatigue starts making decisions for you.
The easy fix: Use the “slow down, drive up” rule
Lower for two to three seconds, pause briefly if you need more control, then stand up with intent. You do not need to move slowly forever, but you need control through every part of the rep.
Tempo squats work well here. Use a light load, count “one-two-three” on the way down, and keep your torso braced for the full movement.
- Inhale and brace at the top.
- Pull yourself down with control.
- Keep your knees lined up with your toes.
- Maintain full-foot pressure at the bottom.
- Push the floor away and exhale near the top.
This drill can improve your squat quickly because it takes momentum out of the movement. Momentum does a great job of hiding bad habits.
5. You add weight before you earn it
The mistake: Your load outruns your technique
You can squat with imperfect form and get through a few reps. You cannot keep adding weight to poor reps forever and expect your knees to stay happy.
Many people blame squats when the real issue comes from a sudden jump in training volume, a rushed return after time away, or a barbell weight that turns every rep into a rescue mission. Your body needs time to adapt.
The easy fix: Progress with a simple plan that works
Choose a load that lets you repeat the same clean position on every rep. End the set when your knees cave in, your heels lift, or your lower back loses control.
- Increase weight in small jumps when every rep looks solid.
- Leave one to three reps in reserve on most working sets.
- Choose squat variations that fit your current mobility and skill.
- Track pain, sleep, soreness, and performance instead of guessing.
For general strength training guidance, the CDC physical activity guidelines recommend muscle-strengthening work at least two days each week. Consistency beats the occasional heroic workout that leaves you walking downstairs sideways.
Which squat variation should you start with?
The best squat variation lets you practice good movement without pain or panic. You do not need a barbell on day one to build strong legs.
Good options for beginners and people rebuilding form
- Bodyweight squat: Use it to learn foot pressure and knee tracking.
- Goblet squat: Holding weight in front helps many people stay upright and balanced.
- Box squat: Use it to build confidence and control your depth.
- Split squat: Build single-leg strength and spot differences between sides.
- Front squat: Use it to encourage an upright torso once you control the basics.
Pair your squats with a solid hip hinge. Our guide to RDL form for glutes can help you train your hamstrings and hips without making every lower body workout about your knees.
Watch a proper squat form demo
Reading cues helps, but a clear demonstration can make the movement click. Watch the lifter’s feet, knee path, torso brace, and controlled descent rather than copying every small detail.
Your quick proper squat form checklist
Run through this checklist before each set. It takes about five seconds and may save you weeks of irritation.
- Feet: Keep firm tripod contact with the floor.
- Knees: Aim them in the same direction as your toes.
- Brace: Keep your ribs over your pelvis.
- Depth: Go only as low as you can control.
- Tempo: Lower with control and stand with purpose.
- Load: Choose weight that matches your current skill.
Final thoughts: Make your knees feel safe, not brave
Proper squat form does not demand perfection. It asks for attention, patience, and enough humility to reduce the weight when your body tells you to.
Keep your feet planted, guide your knees over your toes, brace your torso, control your depth, and add weight slowly. Practice those habits consistently, and squats can help you build stronger, more resilient knees.
Start with your next warmup set. Make it clean and controlled, then let your knees retire from the unnecessary drama 🙂