

It’s 6:47pm. You’re standing in front of an open fridge holding half an onion, a jar of olives, and some questionable yogurt. Sound familiar? That exact moment is why freezer meal prep exists.
I used to think freezer meals meant sad grey casseroles and freezer-burned chicken that tasted like a snowstorm. Then I built an actual system, not a Pinterest fantasy but a real one, and my weeknights changed. No more 7pm panic. No more $38 delivery orders for food that shows up lukewarm.
This guide walks you through the whole thing: what freezes brilliantly, what betrays you, how to pack it, how long it lasts, and how to cook it without a three-hour thaw. Ready to make Future You very, very happy?
Why freezer meal prep beats regular meal prep (most weeks)
Standard fridge meal prep has one fatal flaw: a deadline. You cook five identical lunches on Sunday, and by Wednesday you’d rather eat the container. The food doesn’t get worse, exactly. You just get bored of it.
Freezer prep removes that pressure completely. You cook once, then eat that meal whenever you actually want it, three days or three weeks later. Variety without extra work. That’s the whole magic trick.
It also kills food waste. According to the USDA, food waste in the U.S. sits somewhere around 30 to 40% of the food supply. Your freezer is basically a pause button on that entire problem.
The three big wins
- Time compression: Chopping onions for four batches takes barely longer than chopping for one. You batch the annoying part ONCE.
- Decision fatigue killer: At 6pm your brain is fried. Picking a bag from the freezer requires roughly zero willpower.
- Money saved: Buy proteins on sale, cook them down, freeze them. I save around $60 to $80 a month just by skipping takeout on chaos nights.
If you’re brand new to any of this, start with the basics first. This beginner’s meal prep blueprint covers the foundations before you go full freezer mode.
The golden rules of freezing (learn these or suffer)
Freezing isn’t magic. It’s physics. Water expands into ice crystals, those crystals shred cell walls, and when you thaw, the texture collapses into mush. That’s why your frozen cucumber experiment went so badly.
So the goal is simple: freeze fast, keep air out, thaw smart. Here’s how that plays out in real life.
Rule 1: Cool food completely before freezing
Never shove a steaming pot of chili into the freezer. You’ll raise the temperature of everything around it and partially thaw your other food. Spread it on a sheet pan or use a shallow container to cool it fast, then bag it.
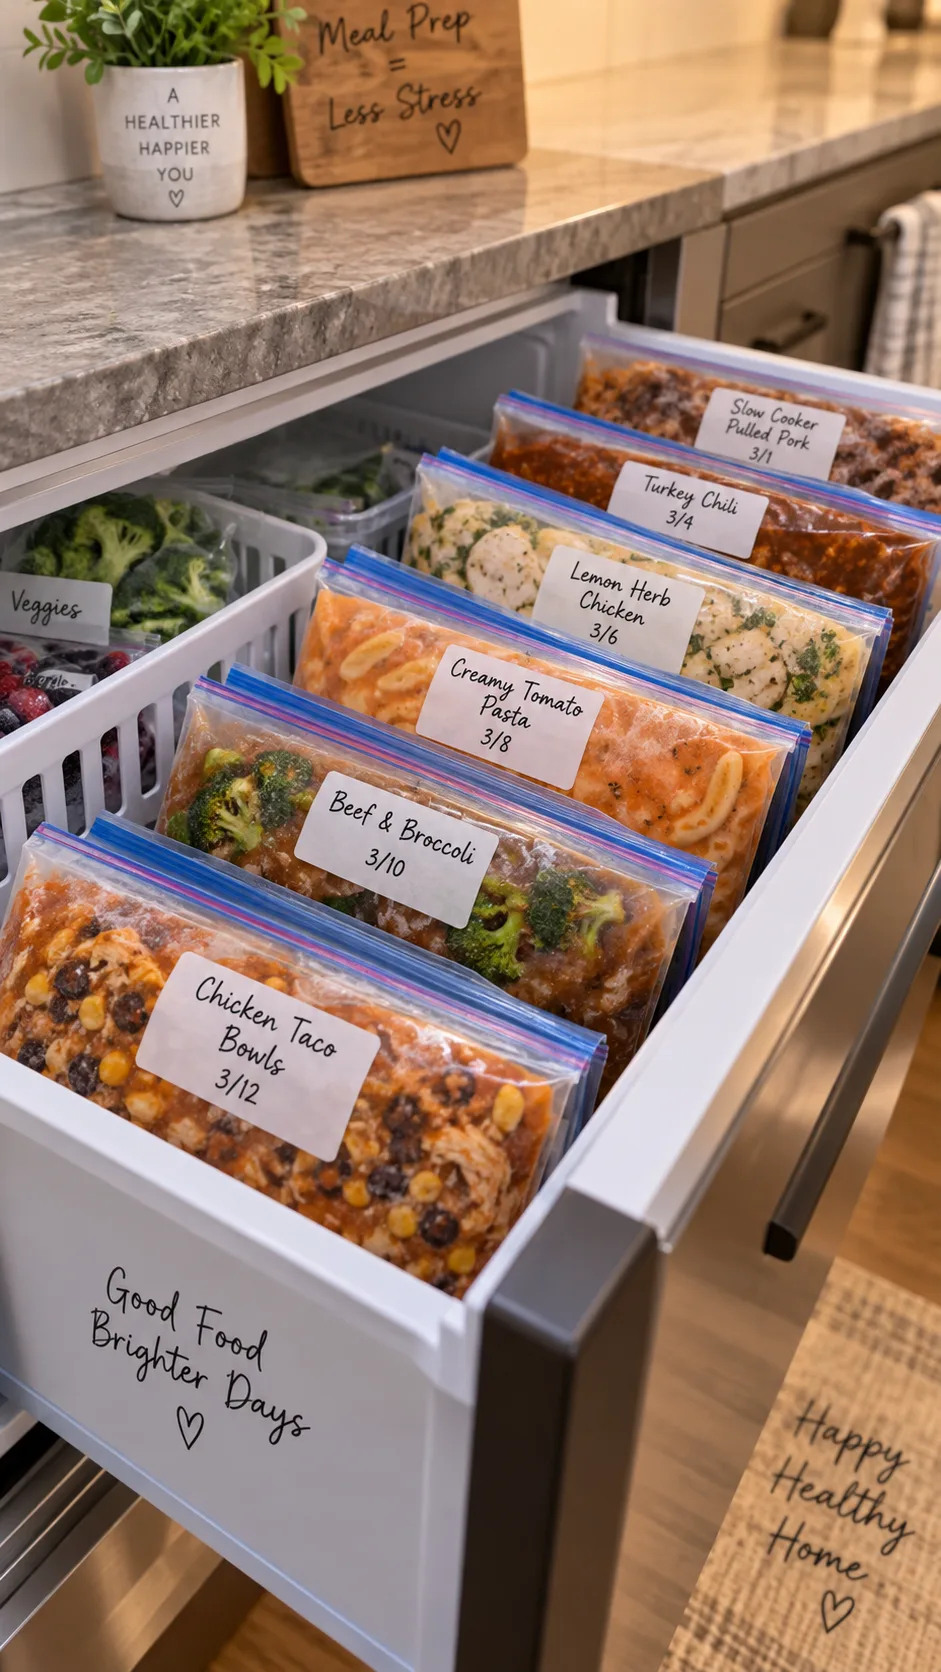
Rule 2: Freeze flat, store vertical
Fill a zip-top bag, press it flat on a baking sheet, freeze it solid, then stand it upright in a bin like a file folder. Flat bags freeze in about half the time and stack like a dream. This single habit doubles your freezer capacity.
Rule 3: Squeeze out every molecule of air
Air causes freezer burn. Freezer burn causes sadness. Use the water displacement method: lower the bag into a bowl of water until the pressure pushes the air out, then seal above the waterline. It works almost as well as a vacuum sealer and costs nothing.
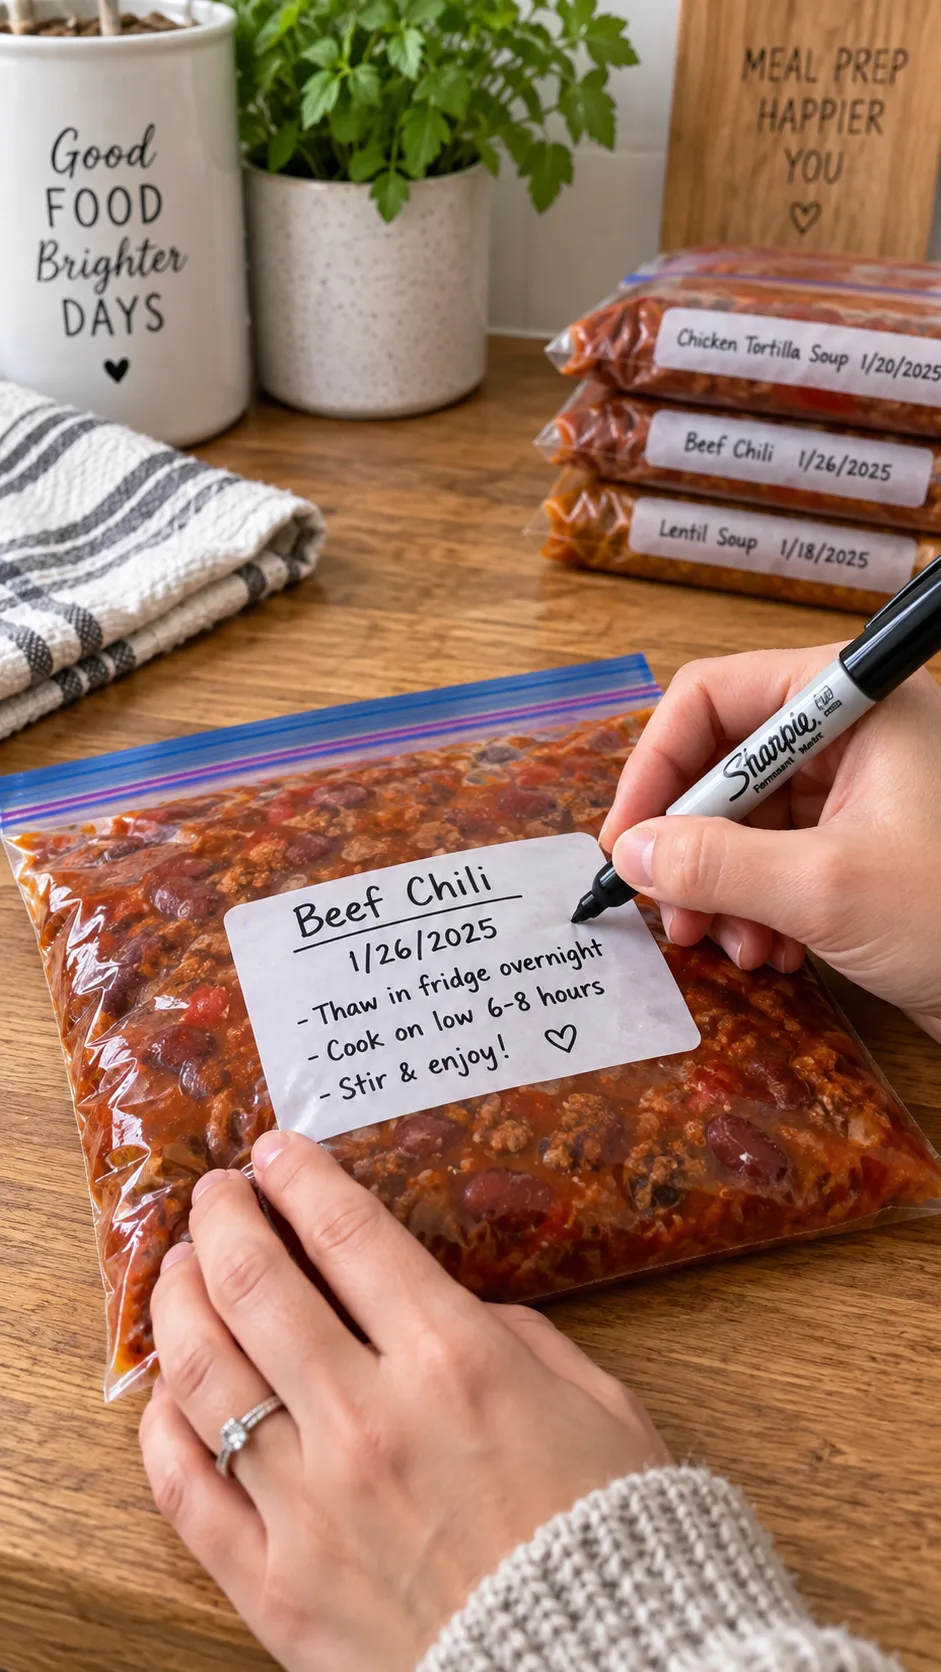
Rule 4: Label like a person who forgets things
Because you WILL forget. Every package needs three things:
- What it is (be specific, since “soup” helps nobody)
- Date frozen
- Cooking instructions: temp, time, and whether it needs thawing
Future You, standing there hungry and grumpy, will genuinely thank you.
What freezes beautifully vs. what absolutely doesn’t
This is where most people crash. They freeze a creamy pasta bake, thaw it, and discover a grainy science experiment. Let me save you the heartbreak.
Freeze these with total confidence
- Soups, stews, chilis, curries: they taste BETTER after freezing, since the flavors keep marrying
- Marinated raw proteins: chicken thighs, pork chops, flank steak in a bag with sauce. They marinate while they thaw. Genius, honestly.
- Cooked shredded meats: pulled pork, shredded chicken, taco beef
- Meatballs, burger patties, meatloaf mix
- Cooked grains: rice, quinoa, farro (freeze in portioned flat packs)
- Casseroles and enchiladas (assembled, unbaked)
- Cookie dough balls, muffin batter, pancakes, burritos
- Sauces: marinara, pesto (freeze pesto in ice cube trays), curry bases
Do not freeze these. I’m begging you.
- Cream and milk-heavy sauces: they split and go grainy. Add dairy AFTER reheating instead.
- Raw high-water vegetables: lettuce, cucumber, celery, radish, raw tomato slices
- Cooked pasta as a standalone: mushy city. Inside a baked casserole? Fine. Alone? No.
- Plain potatoes: they turn weirdly grainy. Mashed with lots of fat freezes okay-ish.
- Fried food: the crunch dies and never comes back
- Hard-boiled eggs: rubbery little hockey pucks
- Sour cream, plain yogurt, cottage cheese: separation guaranteed
Notice the pattern? Water and dairy are the enemies. Fat, protein and starch are your friends. Once that clicks, you can judge any recipe yourself.
The 90-minute freezer prep system
Here’s the workflow I use roughly twice a month. It fills the freezer with 10 to 14 dinners in about an hour and a half. That isn’t marketing fluff: the trick is overlapping tasks instead of doing them one at a time.
Step 1: Pick 4 recipes that share ingredients (10 minutes)
Don’t pick four random meals. Pick four that use the same base. Ground beef chili, taco meat, meatballs, and beef-and-rice stuffed peppers all start from the same five pounds of ground beef and the same onion and garlic base.
Shared ingredients mean one shopping trip, one cutting board, one cleanup.
Step 2: Prep ALL produce first (20 minutes)
Dice every onion, mince every clove of garlic, chop every pepper, all in one go. Pile them in bowls. Stop washing the cutting board between recipes like a maniac. Batch it.
Step 3: Cook the shared base (25 minutes)
Brown all the meat in your biggest pot with the onions. Then divide it into batches and season each one differently. Cumin and chili powder here, Italian herbs there, soy and ginger in the third. One cook, four completely different meals.
Step 4: Assemble and cool (20 minutes)
Portion into bags or containers. Spread them out so they cool quickly, and never stack warm bags.
Step 5: Label, flatten, freeze (15 minutes)
Marker out. Date, name, instructions. Flat on a sheet pan. Done, and your kitchen isn’t destroyed.
Dump bags: the laziest, best freezer meal format
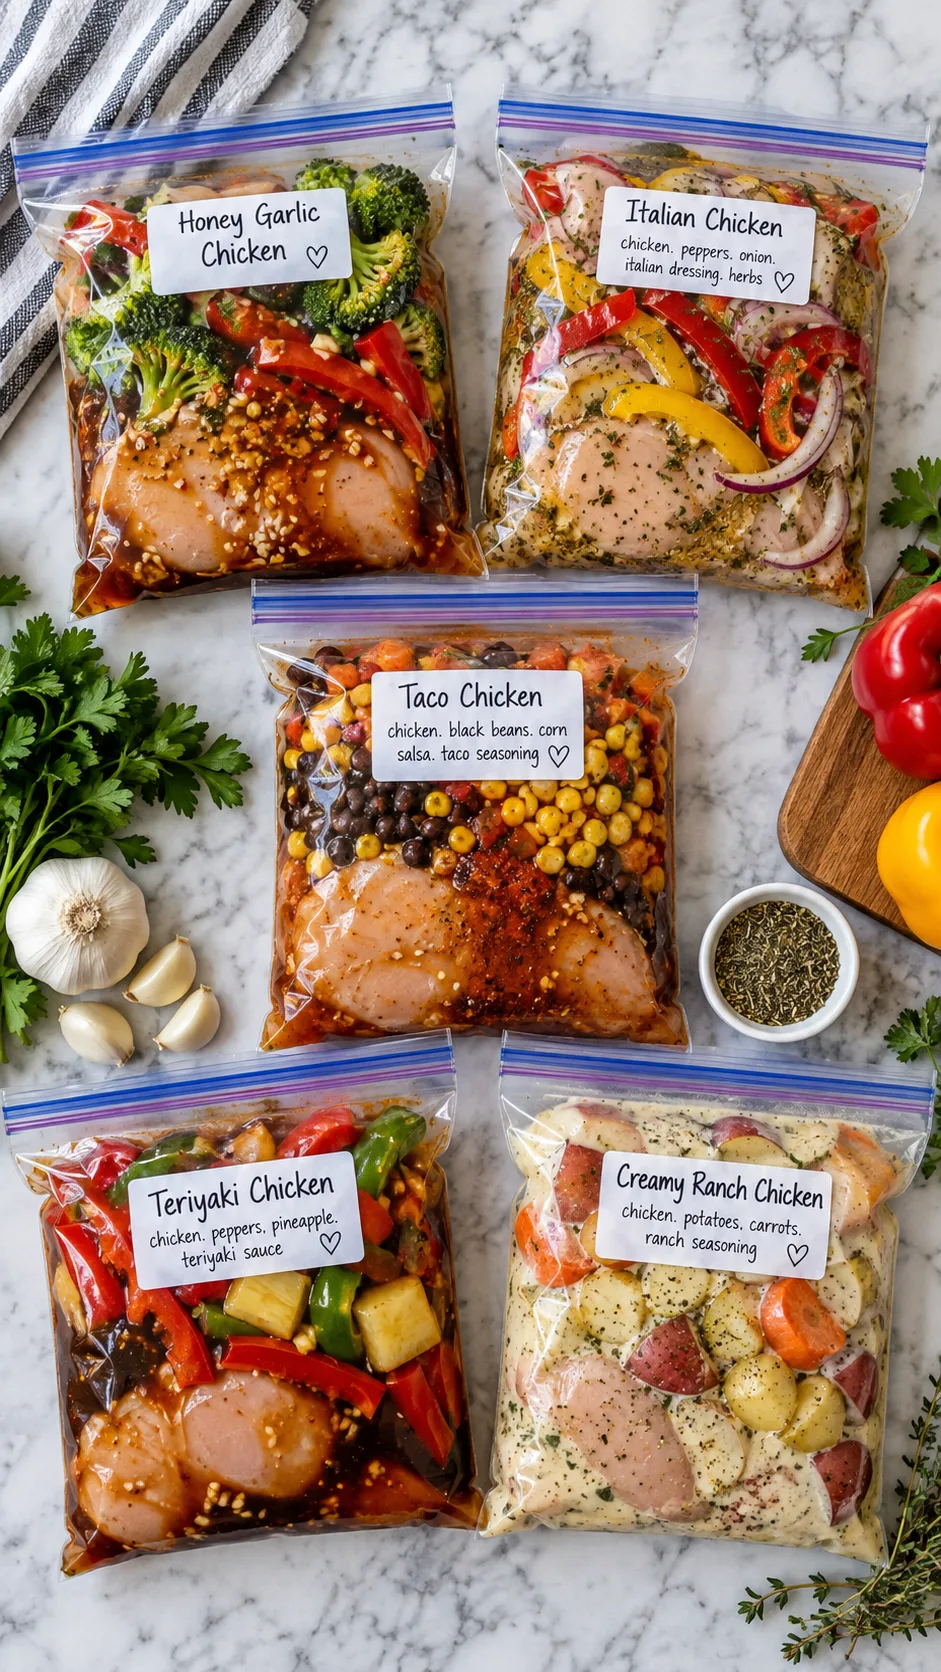
If you only take one idea from this article, take this one. Dump bags are raw ingredients (protein, sauce, hardy veg, seasonings) sealed in a bag and frozen uncooked. You skip the pre-cooking entirely.
On cook night, you dump the contents into a slow cooker, Instant Pot, or sheet pan. That’s the entire process. Prep time runs about four minutes per bag.
My five go-to dump bag combos
- Honey Garlic Chicken: chicken thighs + honey + soy sauce + garlic + rice vinegar. Slow cook 4 hours on low, serve over rice.
- Beef Barbacoa: chuck roast chunks + chipotle in adobo + lime + cumin + onion. Pressure cook 60 minutes, shred.
- Coconut Curry Chicken: chicken + curry paste + bell peppers + carrots. Add coconut milk when cooking, NOT before freezing.
- Tuscan Sausage & Bean: Italian sausage + cannellini beans + crushed tomatoes + kale (frozen kale is perfect here).
- Lemon Herb Sheet Pan Chicken: thighs + lemon + oregano + olive oil + baby potatoes. Thaw overnight, roast at 425°F for 35 minutes.
See the coconut milk note in #3? Always hold back the dairy and coconut milk until cook day. That one rule separates good freezer meals from grainy disappointments.
Food safety: the boring part that really matters
I won’t lecture you, but a few numbers matter here. Your freezer should sit at 0°F (-18°C) or below. At that temp, food stays safe indefinitely, and the FoodSafety.gov cold storage chart is the reference I keep bookmarked.
“Safe indefinitely” doesn’t mean “tastes good forever,” though. Quality is the real clock.
Realistic quality timelines
- Soups and stews: 3 to 4 months
- Raw marinated chicken: 6 to 9 months
- Ground beef (cooked): 3 to 4 months
- Casseroles: 2 to 3 months
- Cooked rice and grains: 1 to 2 months
- Baked goods and muffins: 2 to 3 months
Thawing rules you shouldn’t bend
Only three safe methods exist: in the fridge, in cold water (changed every 30 minutes), or in the microwave if you cook it immediately after. Leaving a chicken bag on the counter all day is how you throw a bacteria party.
And reheat properly. The USDA Food Safety and Inspection Service recommends reheating leftovers to an internal temperature of 165°F (74°C). A $12 instant-read thermometer solves the guesswork forever. Best kitchen money I’ve ever spent, honestly.
Containers: what to buy, what to skip
You don’t need a $400 vacuum sealer. You might want one eventually, but start here:
- Heavy-duty freezer zip bags (quart and gallon): the MVP. Flat-freezing champions.
- Silicone reusable bags: pricier upfront, but they pay off within months and they’re sturdy.
- Glass containers with locking lids: great for casseroles, but leave 1 inch of headspace or you’ll crack the glass. Liquid expands. Physics again.
- Disposable foil pans: perfect for gifting meals to new parents or sick friends
- Silicone muffin trays: ideal for freezing stock, pesto, sauce, and baby-portion servings
- Skip: thin sandwich bags, plastic wrap alone, and any container with a warped lid
One more thing: buy freezer bins. Actual bins. A freezer without dividers turns into an archaeological dig site where you find a mystery brick from 2022.
Mistakes I made so you don’t have to
1. I froze 14 servings of the same chili
By serving six I hated chili. Variety matters even in the freezer. Cap any single recipe at 4 portions.
2. I under-seasoned everything
Freezing dulls flavor, especially salt, garlic, and fresh herbs. Season slightly bolder than feels right, then brighten with lemon juice, fresh herbs or a splash of vinegar after reheating. That final acid hit resurrects almost anything.
3. I overcooked the veggies
Vegetables cook twice: once when you make the meal, once when you reheat it. Pull them while they’re still firm. Serious Eats has solid technical write-ups on freezing behavior if you want to nerd out further.
4. I ignored the “eat me first” bin
Now I keep one bin at eye level labeled EAT ME FIRST for anything over two months old. That solved the rotation problem, and I haven’t dug up a freezer fossil since.
Building your first two weeks
Don’t try to fill the freezer in one weekend. You’ll burn out and hate me. Start small.
- Week 1: Double ONE dinner you already make. Eat one, freeze one. That’s it.
- Week 2: Make 4 dump bags. Twenty minutes, no cooking.
- Week 3: Add a breakfast component, either freezer burritos or egg muffins. These make-ahead breakfast ideas freeze shockingly well.
- Week 4: Add one soup or stew batch, portioned into flat bags.
After one month, you’ve got 10 to 12 meals banked with barely any extra effort. Want to layer in more protein so these meals keep you full longer? These high-protein meal prep recipes adapt to the freezer almost without changes.
The bottom line
Freezer meal prep won’t turn you into a different person with color-coded containers and a laminated schedule. It gives you an out on the nights when cooking feels impossible.
Remember the core system: cool it fast, freeze it flat, squeeze the air out, label everything, hold the dairy, and thaw it safely. That’s genuinely the whole thing. Everything else comes down to recipe preference.
FYI, the best freezer meal isn’t the fanciest one. It’s the one that stops you from ordering pizza at 7:15pm for the third time this week.
Your move: pick one dinner this week and double it. One extra bag in the freezer. That’s your first deposit into what I genuinely call the Future You Savings Account, and the payout hits exactly when you need it most.